"Getting Ready to Glass Your Boat's Hull" !!!
|
Before you can glass there are some things to consider. You are going to need to get things like hand cleaners, throw away paint brushes, five gallon buckets, short nap paint rollers, paint roller frames, throw away gloves and other expendables. You are going to have to figure out how much glass you are going to need for the glassing job. On your plans there will be a lay-up schedule that tells you how many layers of mat and roving you will need in a staggered order that your architect has laid out for you to follow. Remember I talked about marking the different water lines onto your frames? This is his reference point when adding more layers of glass as you get closer to the keel. On my Roberts 54 I used 5 rolls of 1 1/2 ounce mat that was 954 lbs. I used 2 rolls of 24 ounce woven roving that was 381 lbs. I used 10 drums of polyester resin, three drums of acetone, and 60 gallons of West Epoxy. Later when I decked the boat I used 3/4 ounce mat on my deck covered with a 24 ounce cloth. I will check on the cloth but I am pretty sure it was 24 ounce if I remember right. What stick's out in my mind is how much epoxy it sucked up. I viewed it like sucking dollars out of my wallet. Now for getting the foam ready I used pigment In my resin for the first coating of resin on the Airex Foam so I could see any air bubbles under the cloth. Also what this light coating does is cause a styrene migration into the foam, this causes a chemical bond between the foam and the resin, so I am told. So what you need to do is make a list out for the materials you will need and start checking prices out, shop around or else you will spend more than you need to. Just a note here, when I foamed my mold, I used Airex on the keel area because it was an easy foam to work with. You have to extract the foam out of the keel area for your ballast to be installed inside the keel area. I waxed this foam real good so I was able to extract it. My design was for the foam to go about 18 to 20 inches below the water line if I remember correctly. How ever, I ran my foam all the way to the turn of the bilge and from that point I remove the foam out of the keel when I turned my hull over to get ready to glass the inside.
|
I started out glassing by coating the Airex foam with a lightly pigmented coat of polyester resin just heavy enough not to fill the holes of the foam completely and letting it catalyze. I used a 5 gallon bucket with about 2 1/2 gal. of resin, "which I would suggest that If you have not done this before to experiment with maybe 15 cc of hardener to a gallon of resin in a small batch, and try glassing a piece of hard board with some mat so you will be familiar with what it is like to glass with a short nap roller and polyester resin. Remember to make sure you don't have air bubbles,you don't want air bubbles in your lay-up. Get a aluminum roller that has ridges in it to roll them out as you go along with the lay-up. Also keep in mind that weather conditions and humidity can make a difference in the rate of cure in your resin bucket and on your lay-up. I remember a day that was really dry but was about 65 degree's and I mixed up a normal batch of resin like I would do on warm humid days, well I got It mixed up, climbed up on the scaffold and began wetting out the mat. I had wet out about 4 square feet and I noticed that the resin started stringing off of the roller at which point I knew I was really in trouble, I looked into a smoking bucket to a gelling goo. The bucket was already going off so I had to try and snatch the glass off of the boat which made a royal mess. So be aware what the weather is like before you mix. I really thought I would have an easy time because of the coolness but I did not take in to account the dry humidity that day.
Here is a link on using catalyst. http://www.perryfiberglass.com/plastic_duct/PDF/screen/catalyst_to_resin_screen.pdf One should use rubber gloves and eye protection when handling these materials as well as a dust mask for grinding or a suitable respirator when around fumes. For the most part I built my boat by my self because a few people told me I could not do it. About the only time I had help was when I was painting and fairing the boat,where a extra sets of hands were needed and just made sense when you were on the scaffolding and needed helped. Any how I laid the whole boat up by myself, so I had to have stopping points because 54 feet is not a one day job for a lay-up. This means I had to lay it up in sections starting from the bow . I would complete that section by staggering the layers of glass toward the stern of the boat, then let that cure over night. So before I could start another lay-up I would have to sand the staggered layers where I |
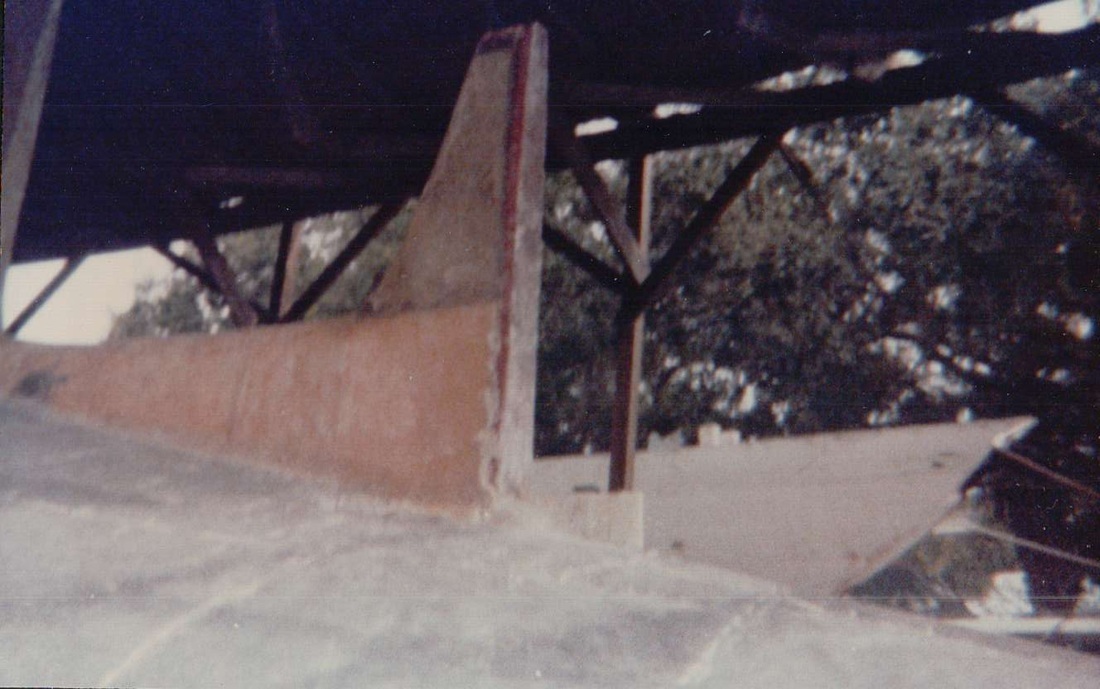
PHOTO #1
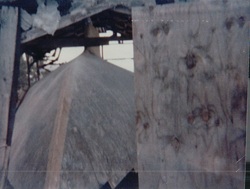 PHOTO #2 PHOTO #2
stopped before, and once that was sanded I could integrate the next section of glass into the sanded layers to start another lay-up. So my advise is "get some help even if you have to pay." If you cannot finish the lay-up in one day and you glass the whole boat your going to have to sand the whole thing again,so you had better figure out a stopping point.I glassed my first layer on the whole boat and sanded it after it cured. Right then I knew I was Not going to sand 17 layers of glass to get past the wax on the surface of the lay-up, so that's how I came to do the staggered lay-up to minimize the sanding I had to do. Another thing to do is make sure you have transferred your water line marks from off of the frames on the inside to the out side of the foam so you know where to start adding layers of mat and woven roving from your lay-up schedule. One thing I did is when I got to the bottom of the keel I lapped my glass over the bottom from each side so I would have 34 layers of glass on the bottom of my keel. I would like to point out photo 1 & 2. In #1 If you will look closely at the skeg you will see that I have installed a internal stiffener on the back side of the skeg out of a piece of hardwood and also one on the bottom of the skeg which will be a compression spacer for when the rudder shoe is installed. You can also see the yellow colored foam that runs in both pics from the stem to the stern that are waxed so they can be removed. You can see in all three photo's where I have sanded sanded the first lay-up of glass.
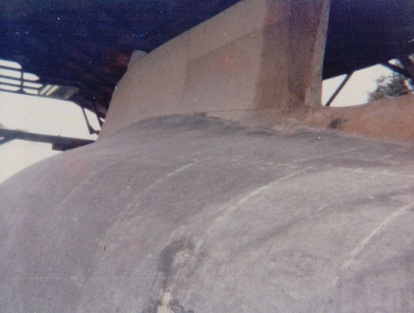
PHOTO #3
©2014 shipshapetipsboatbuildingandrepairs.com “All Rights Reserved”
|