" There are Good Reasons for Fairing the Boat while Upside Down "
|
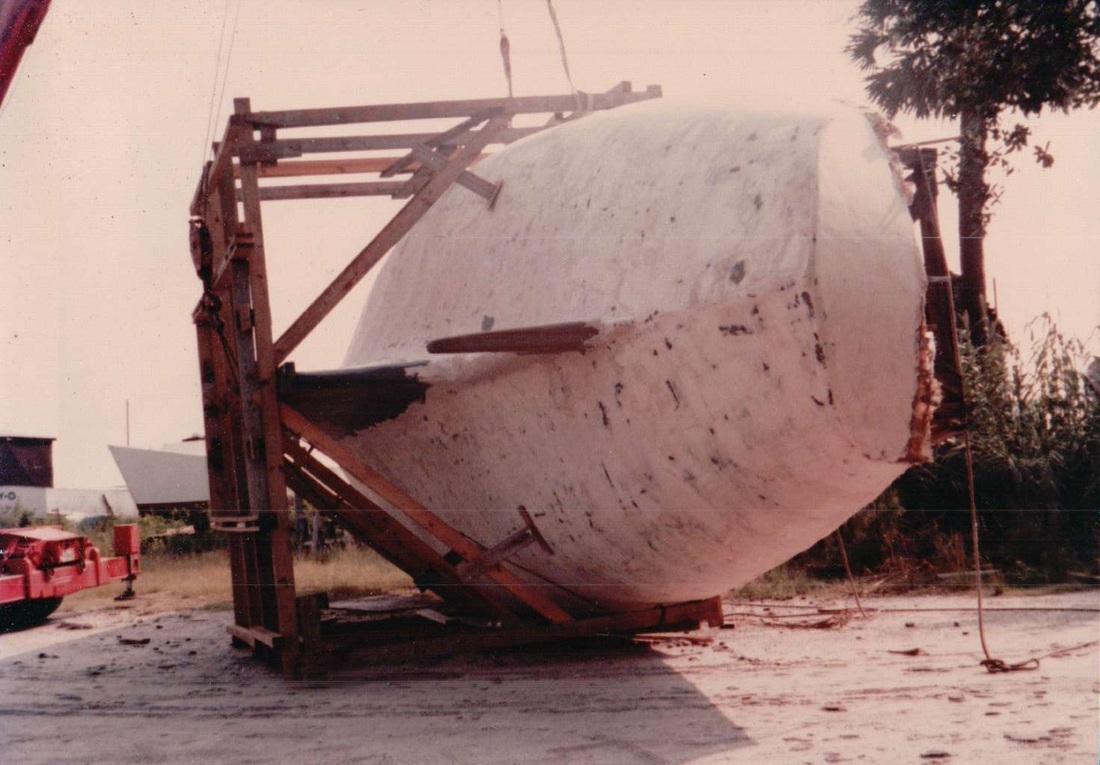
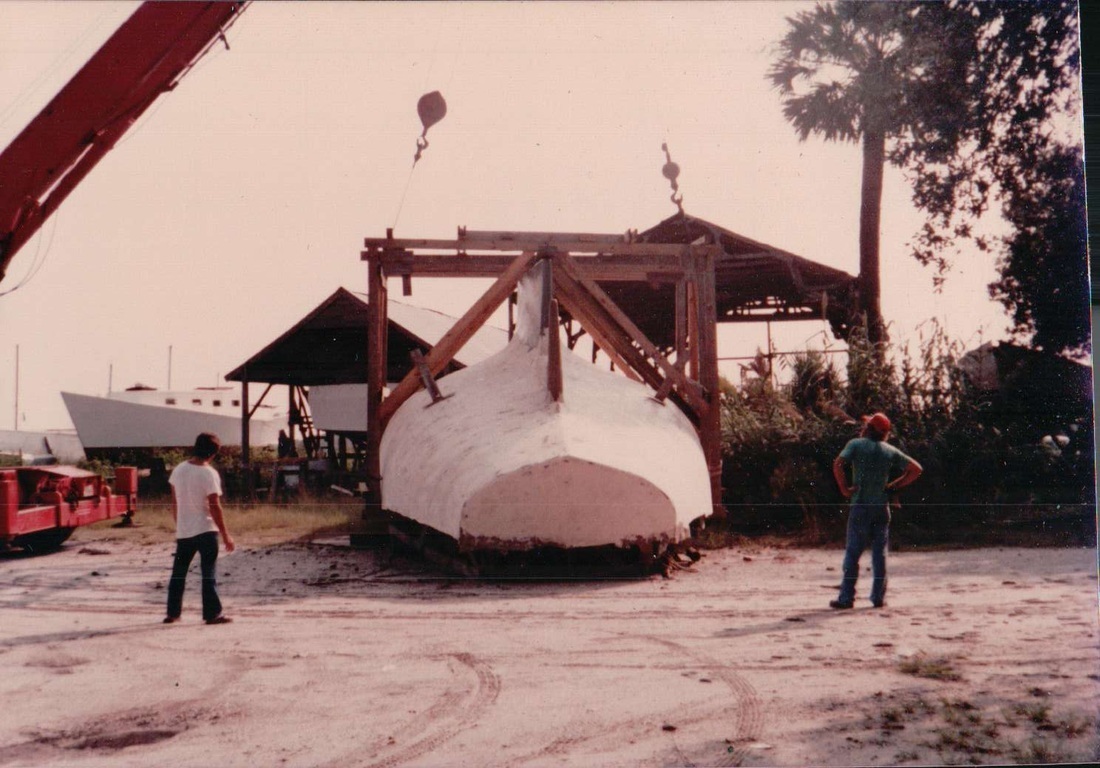
One good reason to fair upside down, is I did not do that!! Big mistake on my part. There is a big difference with being able to hold the fairing board lying on the hull rather than standing under the hull looking up, with the board held up in the air and your arms are becoming fatigued while trying to sand the hull fair. Fairing the hull upside down is the way to go, and I would fair it all the way to spraying the primer coat on the hull before turning your hull over. I would not paint the boat with topside paint for two reasons, you still have to tie your deck to hull connection together which you still have to glass the shear and fair it out to the rest of the hull and when turning the boat over the straps, or cables in my case tend to mess up your paint job when the crane is turning the hull over. Take a look at the two pics at the beginning of the lift and you can see this could present a problem to one's paint job. Although the crane guy doing the lifting did not even scratch the Fairing compound. I was lucky his company sent him as he and I knew one another from working together on jobs my company had hired his company to do lifts for us. They just happened to sent him that day ,and when he saw me he came up and said, " You know I have always let the customer tell me how they want it done, but " I know you and I ain't letting you mess this up" , so I said " O.K. Henry, you do it like you want." He did a great job of flipping the boat in the air using both cable's on the stick to complete the turnover. So back to the subject at hand, fairing your hull. you will need to decide just what kind of materials you are going to use to fair your hull out with. I used micro balloon's and polyester resin to fair out my first phase of that job. I would not go below the water line with the micro's and polyester resin, any thing below the water line needs to be a good quality epoxy fairing compound. A great source for these materials is merrittsupply.com in Pompano Beach Fl. You can call these guys up tell them what your doing,
|
and they can recommend the latest quality products that they carry. You may want to check " Don Casey " out for finishing or refinishing a boat hull,he has many tricks for hull fairing. Some of the things you will need you may have from laying up the fiberglass hull but you are going to need a couple of sanding boards, one for contours and the other straight for the flat stuff. After I finished glassing, I waited about four days to sand on my hull . No real rule here, just wanted to make sure I had a good cure before I started sanding on my hull to get any wax or contamination off of the surface of the hull. I used an extra layer of 1 1/2 oz. mat for my last layer of glass because I planed to sand it with 100 grit paper to prepare it to receive the fairing compound. I used a 6" orbital Porter Cable angle sander to do my sanding,
It is a great little machine. I was now ready to sand the hull down, I had my throw away paper coveralls and a good respirator mask with a pair of light weight gloves to keep any fiberglass splinters from sticking me in my hands. It took me a couple days to get her sanded but I felt it was time well spent to be sure I had a good bond between my compound and hull. At the time that I did this I used polyester resin mixed with micro balloon's. Today I would do the fairing with epoxy resin along with the many different blends of compounding powder that is offered today. Using epoxy resin In your compound or a premixed epoxy compound in my view is like having an extra barrier cote on your hull. Never use polyester compound below the waterline. You can buy some good below the water line compound all ready made up , epoxy products to fair below the water line. The next step that I took when the sanding was finished and I had all my materials together was to take a batten and go down the hull checking for the hulls fairness by laying the batten across the hull in different directions to find any high and low spots which I marked a circle around and labeled high or low. I always would fair from the low spots to the high spots so as not to grind to much glass off from the hull. If you took care with sewing your core on, you should not have any deep lows or any unusual highs. So once you have located all the high and low spots on your hull you can start applying your compound. I bought |
a cheap carpenter's hand saw and removed the handle to make a tool for spreading the compound over the hull by bending the blade to conform to the hull as you spread it on.
I also used a notched trowel to fill any deep low spots in my hull. You use the notches on the edge of the trowel to create farrows in the lows and let them cure. After the farrows have cured you can take a fresh batch of compound and spread it over the cured farrows creating a more even surface to work with, than if you had tried to put all the compound on at one time. If you need a little more info. on the fairing process you can get the published guide that details fairing and finishing from the west system. Once you have your compound on and it is cured you can start sanding the boat with a board sander, I made one out of thin fir plywood about 3 1/2 ft. long or as long as you can comfortably manage and begin sanding in different directions bringing the hull into a fair state as possible. I went back a number of times and sanded again and again til I had the hull Faired real close and I was happy with what it looked like and felt like. I then sprayed the hull with a high build primer which is like a sprayed compound to get all the little Whoopies out that I may have missed, and I did this a couple of times sanding each coat of high build primer. I used the 3-m sanding board system on the high build primer which had Velcro on it to attach the 120 sand paper. The boards were made out of some kind of composite plastic and they worked real well for that final fairing. One was flexible and the other was straight for any flat surfaces you may encounter. When I was satisfied with my surface I shot it with two coats of 545 Awl Grip epoxy primer. I shot one coat and came back and shot it again while it was still green so I would not have to sand again before shooting it one more time. The 545 is good for both above and below the water line. I would not sand the primer until I was set up to paint the boat later after you have the hull and deck tied together. When you are to this point it is time to turn the hull. |