Getting Ventilation Below Deck
|
The first thing that I did was to construct the Dorade deck pipes that transfers the air from the cowl vents to the inside of the boat. I will begin by saying that none of the drawings are to scale and the measurements were for my boat,you will have to build the pipes to suit the depth of the top of your deck to the exposed side of your headliner material where the Dorade pipe stops,I made my pipe a little long so once through the deck I marked them and cut them off, a nice teak ring may be installed to finish the opening out. You will need to make adjustment's on the threaded stainless steel rod to suit your configuration. You will need some butterfly knobs to screw on the the bottom of the all thread rod. Use the red thread locker when installing your knobs.
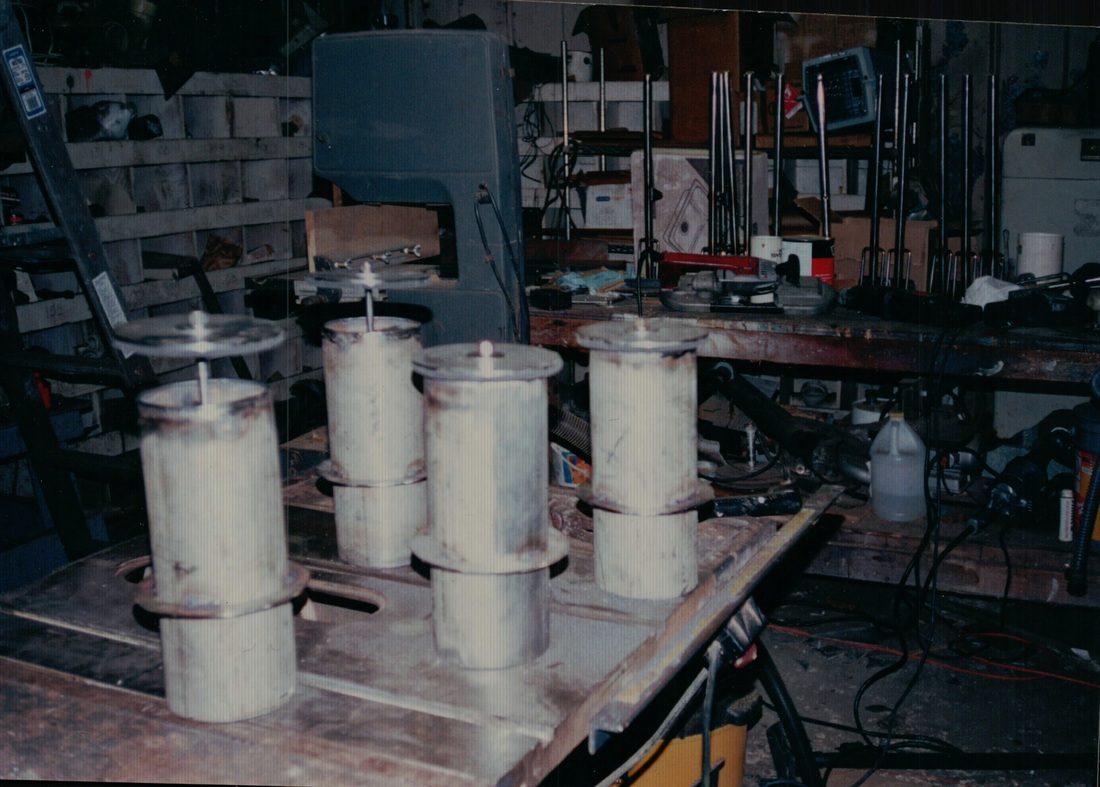
DECK PIPES READY FOR INSTALLATION.
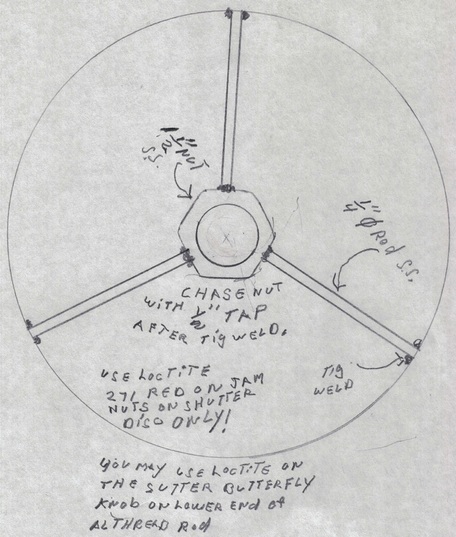
SHUTTER SUPPORT FRAME FOR ALL THREAD ROD. NOTE : THE 1/4" ROUND SEALING ROD AROUND THE TOP OF THE DORADE PIPE OMITTED FOR CLARITY.
|
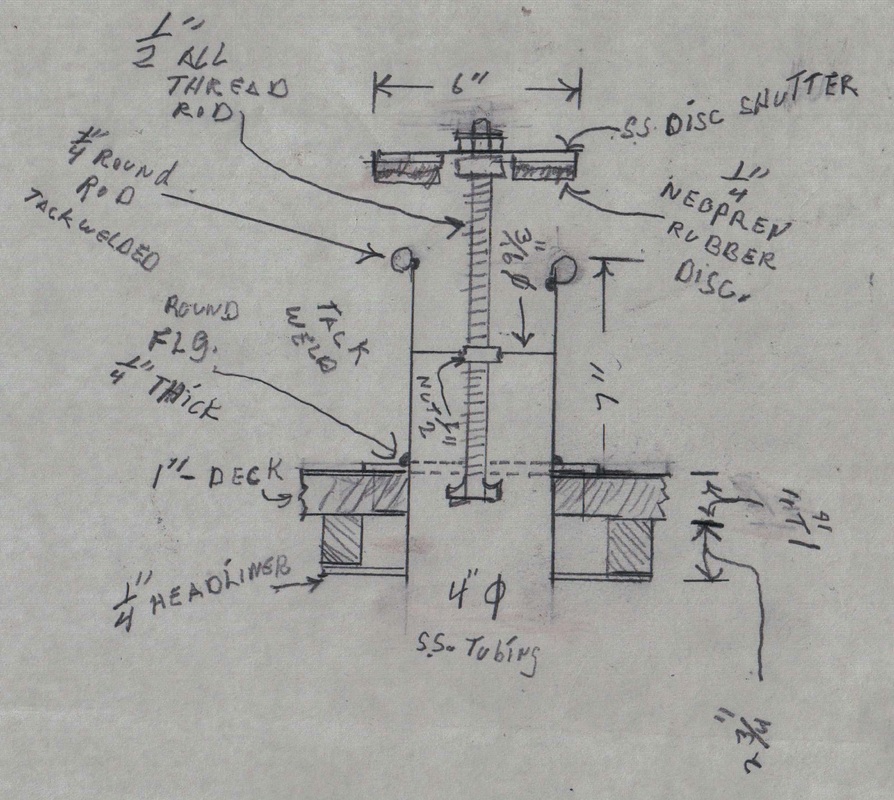
DECK PIPE WITH A CLOSABLE SHUTTER
I used 4" 10 GA. s.s tubing for my deck pipe's,as you can see in the elevation view above and the pic to the left these pipe's have the capability to Adjust the air flow or completely shut it off with a water tight seal. Their is no need to go on deck to take the cowl vent off and screw the deck plate in,when it can be done from below deck. The 10 Ga. stainless steel disc shutter has a 1/4" neoprene disc to seal out any cold draft or water, it is held in place by two half inch nuts with fender washers and also attaches to the stainless steel disc with 5200 by the 3m company.The neoprene seals against a 1/4" s.s. round rod tig welded around the top of the pipe.Make sure when you mount the shutter to the all thread rod that you use 5200 under the washers to keep the joint water tight, or you may have a drip in severe weather. In the pic of the shutter support,looking down inside of the pipe it shows the position of the three stainless steel standoff's welded to the 1/2" nut and the pipe. Keep in mind when the nut is welded on you will have to run a 1/2" tap through it to chase the threads, because the heat changes the tolerance of the threads. Of all of the metals I have welded stainless steel moves like no other,so make sure you tack weld about every 1/2" of the round rod on top of your deck pipe and then chain weld it in different spots till you have a continuous weld. On the round deck flange that will support your pipe on the deck I would put six two inch welds spaced equally around the top side of the deck flange ,and do not put any weld underneath it or it will hamper your deck installation of it. I chose to use a heavy amount of 5200 to set my pipes in the deck so I would not have to thru bolt them down to the deck. I did this knowing I would be glassing my dorade box's to the deck so if I had a need to remove the pipe for maintenance I could use a heat gun to heat the 5200 enough to soften it to pull the pipe out. If you choose to do this, make sure you fill the cracks around the inside deck flange next to the deck pipe where you made the chain welds, be sure to fill in the cracks well. You may choose to weld the deck flange solid,if you do make sure you use a tig welder to do this, as a matter of fact use a tig welder for everything on the deck pipes, creates no splatter on the dorade's deck pipe.
|
The Building Of The Dorade Box's

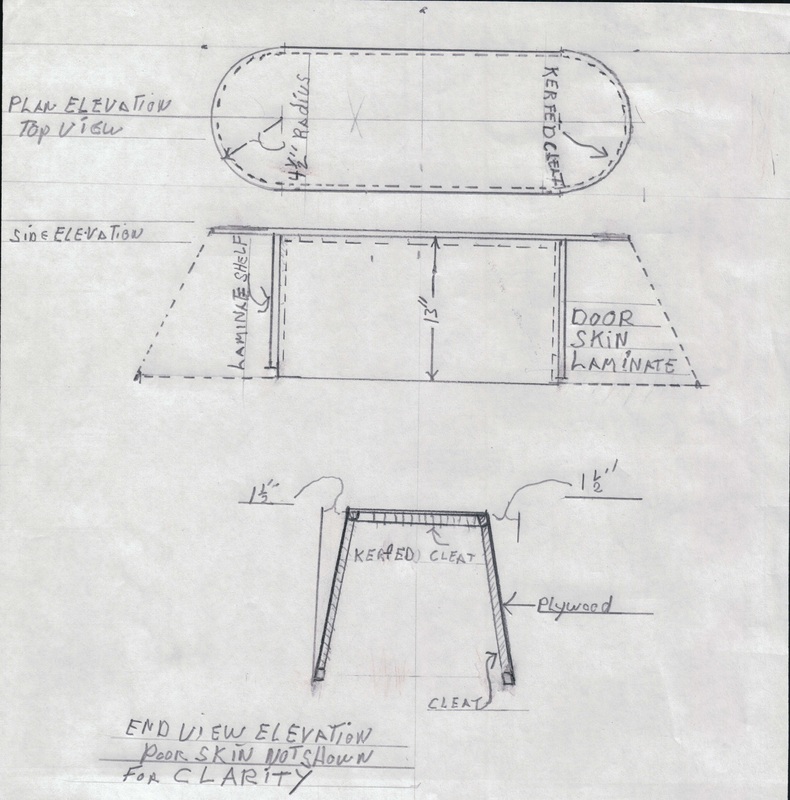
THE FRONT END TAPERS IN 4" AND THE BACK 2", THE SIDES TAPERS IN FROM 12" ON THE BOTTOM TO 9" AT THE TOP ON THE CENTER LINE.
NOTE !!!!!! IF YOU FEEL YOU WOULD NOT WANT TO DO THE RADIUS DORADE, I HAVE SEEN SOME VERY NICE LOOKING BOXES THAT HAVE NO RADIUS END'S . YOU CAN STILL USE THEM WITH THE ABOVE PIPES.
|
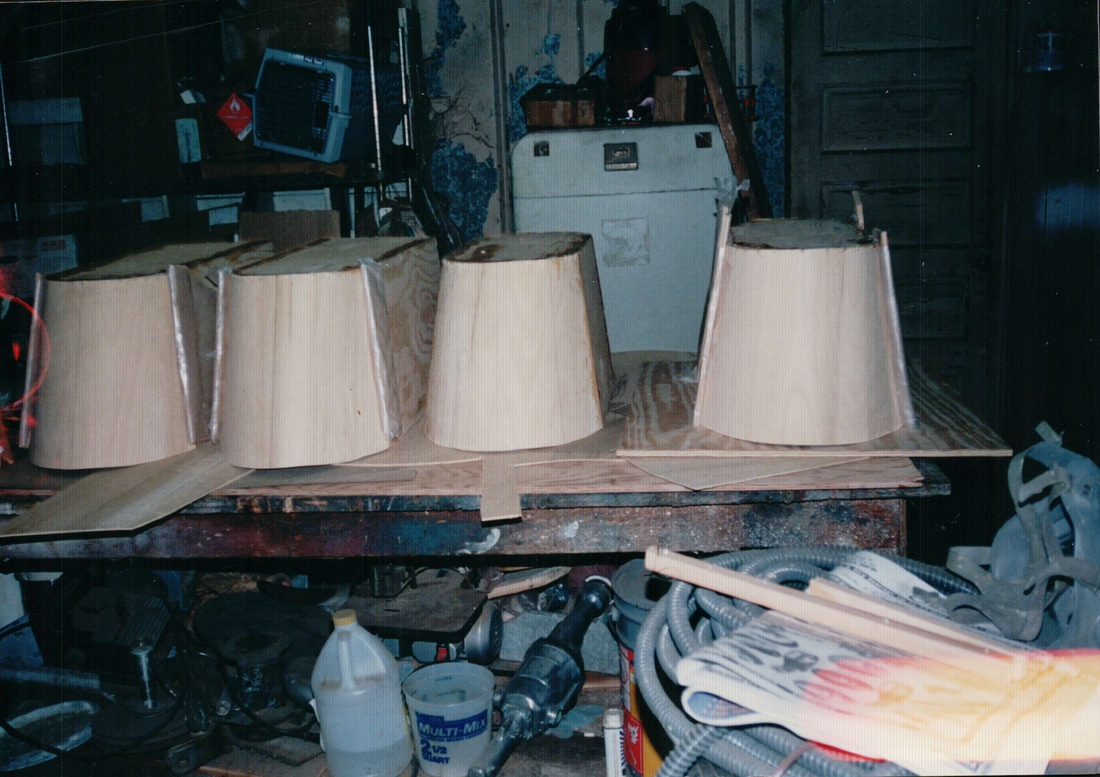
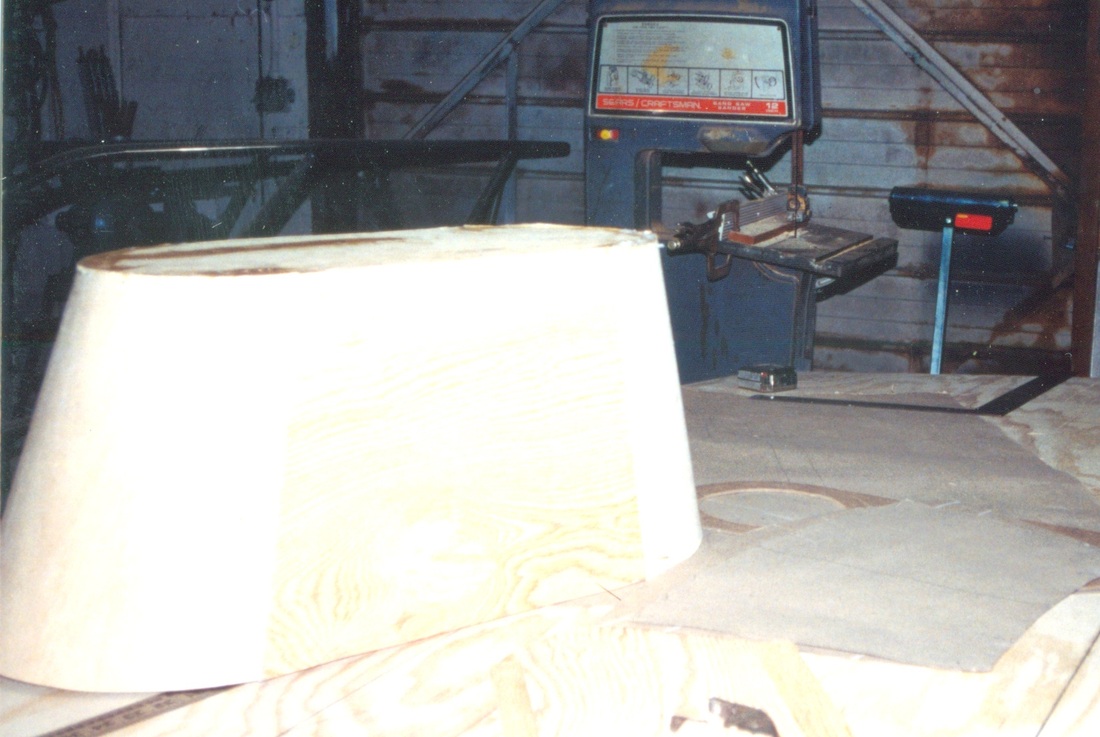
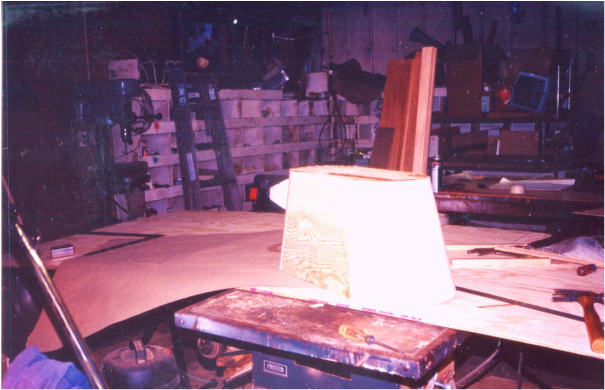
THE FIRST LAYER OF DOOR SKIN FITTED ON THE DORADE BOXES. THE THIRD ONE FROM THE LEFT IS THE COMPLETED LAMINATIONS.
I built my dorade boxes out of 3/8 fir plywood,you may also use Core cell or Airex foam to construct your boxes. I made my dorade's in this manner, I constructed a three sided rectangular box with a 9" radius extending on each end of the tops of the dorade box so I could laminate the radius ends with 1/8" door skin, to be laminated to the thickness of the 3/8" fir plywood. I used 5/8"x5/8" fir cleats to put the sides together sawing kerfs in the one's for the radius ends so i could bend them in place.The vertical cleats in the side elevation view are 5/8" thick by 1 1/2" wide to fasten the door skins when wrapped around the ends when you laminate them. I used an epoxy glue mixed with cotton fiber to laminate the door skin to the rectangular dorade box.I used monel staples and an air staple gun to do the fastening. When I had cut out all the flat pieces,before I put things together I glassed them all front and back, except the door skin pieces which have to be laminated one at a time to make the radius ends. Remember to glass all the butted joints with filet's.and 10 oz. glass cloth as use on the rest of the dorade box.
Dont forget to put weep holes in your dorade box for drainage, put them were any water that gets inside can fine its way out to the deck , I made mine 1" next to the deck.
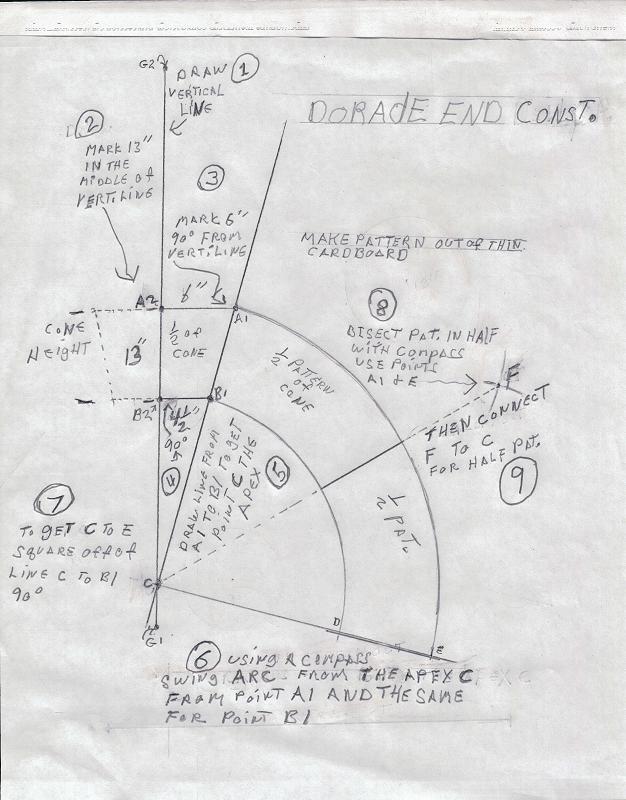
In the pic to the left is how to lay out the radius wrappers for you radius's. Starting with #1 draw a vertical line on some rigid temp. paper or a piece of door skin. You will need a fairly big piece to do the layout on.#2 Mark the height off in the middle of the vertical line as shown,it will be however tall your dorade boxes needs to be a2 &b2,for illustration mine needed to be 13" high. #3 Next mark off A2-A1,this is the bottom of the radius, my boxes are 12" wide so you use half that 6" or what you box needs to be. mark the top next #4 B2-B1, my top of my dorade box is nine inches wide,so you mark half,4 1/2" or what your box needs. Now you have a profile of half of a cone or funnel, #5 Draw a straight line through A1and B1 till it intersects the vertical line G1- G2 to form the apex C,this will be your pivot point to swing your compass to form the radius for the top and bottom of the cone sections. #6 Set your compass from the apex C to point A1 and swing an arc around far enough to reach point E. Next set the compass from the apex C to point B1 swing another arc far enough to reach point D. #7 square off of line A1to the apex (C) with a framing square ,and draw a line from point C through the two radius's you swung to form points D & E. #8 Bisect as shown an you have two templates , one extra in case you lose one.:) The half pattern is what forms the end of the dorade box. Mine took four layers . I will cover installing the boxes in the next article.
|